I managed to fix the X-axis trolley to reduce both the wobble of the carriage as well as increase the accuracy of the cuts. I replaced the loosely-fitting cotter pin with a snug machine screw and there is currently no noticeable slop during the dry runs I have done tonight. I will do more testing tomorrow.
Here are some videos of it in action (before the fix)
In order to get Openvpn Access Server to allow ethernet bridging which will allow us to access our home network we must first install Openvpn Access Server. A tutorial by Digital Ocean is posted below that walks you through the Openvpn Access Server Setup.
Once the server is installed we want to to enable ethernet bridging on the setup page.
NOTE: In this article we are using port 943, Openvpn Access Server's default port. If you changed your port post installation then adjust accordingly to access the admin panel.
This can be done by logging into the admin side of the server using the domain/ip extension: mywebsite.com:943/admin
Next we want to change the vpn mode to ethernet bridging which can be done my going tomywebsite.com:943/admin/vpn_mode
The page should have two options, one for ethernet bridging and one for routing. We are going to choose the ethernet bridging option
Once the option is selected press the save settings button at the bottom of the page and your server should be ready to go.
If your server's hostname is its ip address inside the network one may run into issues so it would probably be a good idea to check the server network settings available at: mywebsite.com:943/admin/server_network_settings
For instance if your server's internal ip is 192.168.1.34 the vpn is going to have trouble connecting to it from outside the network.
Howerver, if your server's hostname/ip is something that is accessible from outside the network such as mywebsite.com or its external ip address the server should be good to go!
I hope this article helps you setup your Openvpn Access Server. If you have any question feel free to contact me at [email protected] or through the contact section of the website.
After putting this project on the sideline for over a year I can happily say that it now works.I am still learning how to use the cam software so I have only been able to cut out squares. However, these squares are accurate to a 1/16″ and have little dross on them. The material used for these squares was 22 gauge steel sheet. However, the material thickness is really only dependent on the power of the plasma cutter. I am still learning how to use both Mach3 and SheetCam so hopefully, I will be able to cut out more complicated parts in the near future. I am also planning on making a cnc tubing coper that will hopefully debut in the near future.
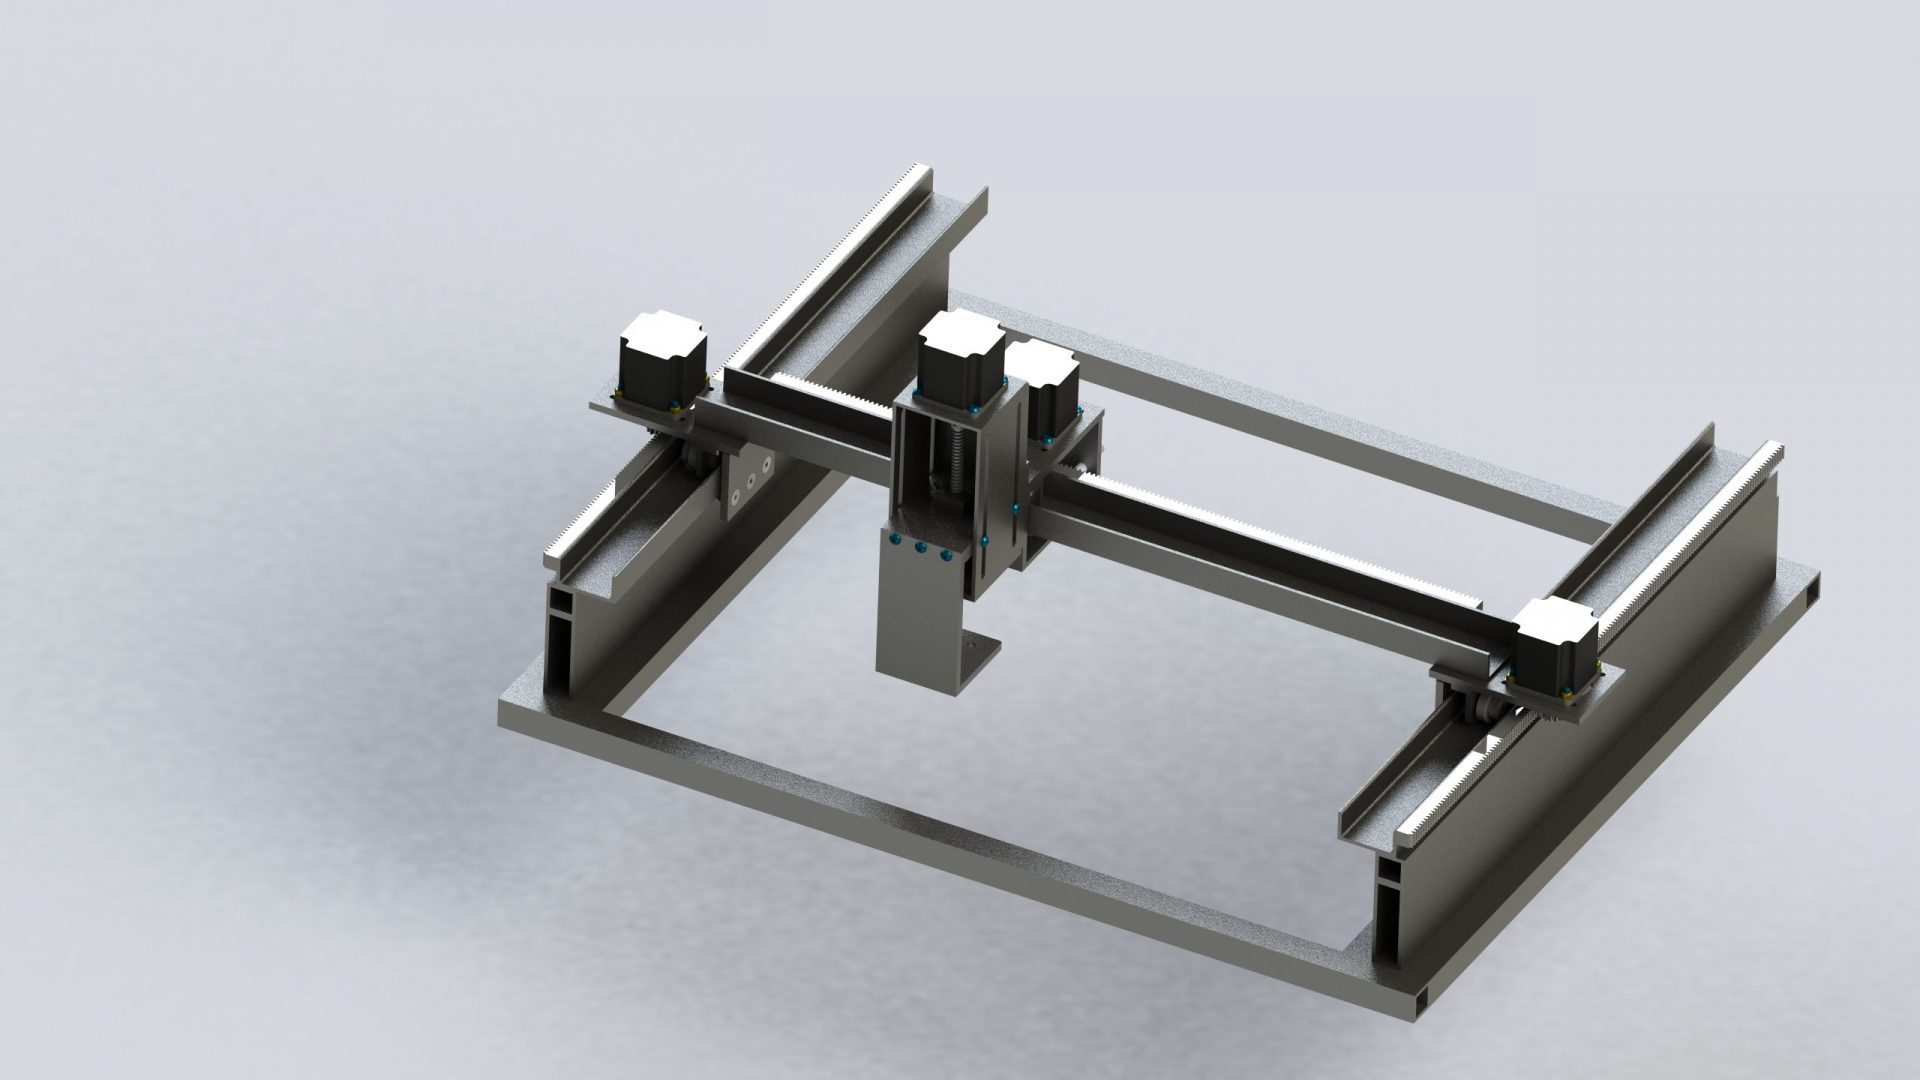
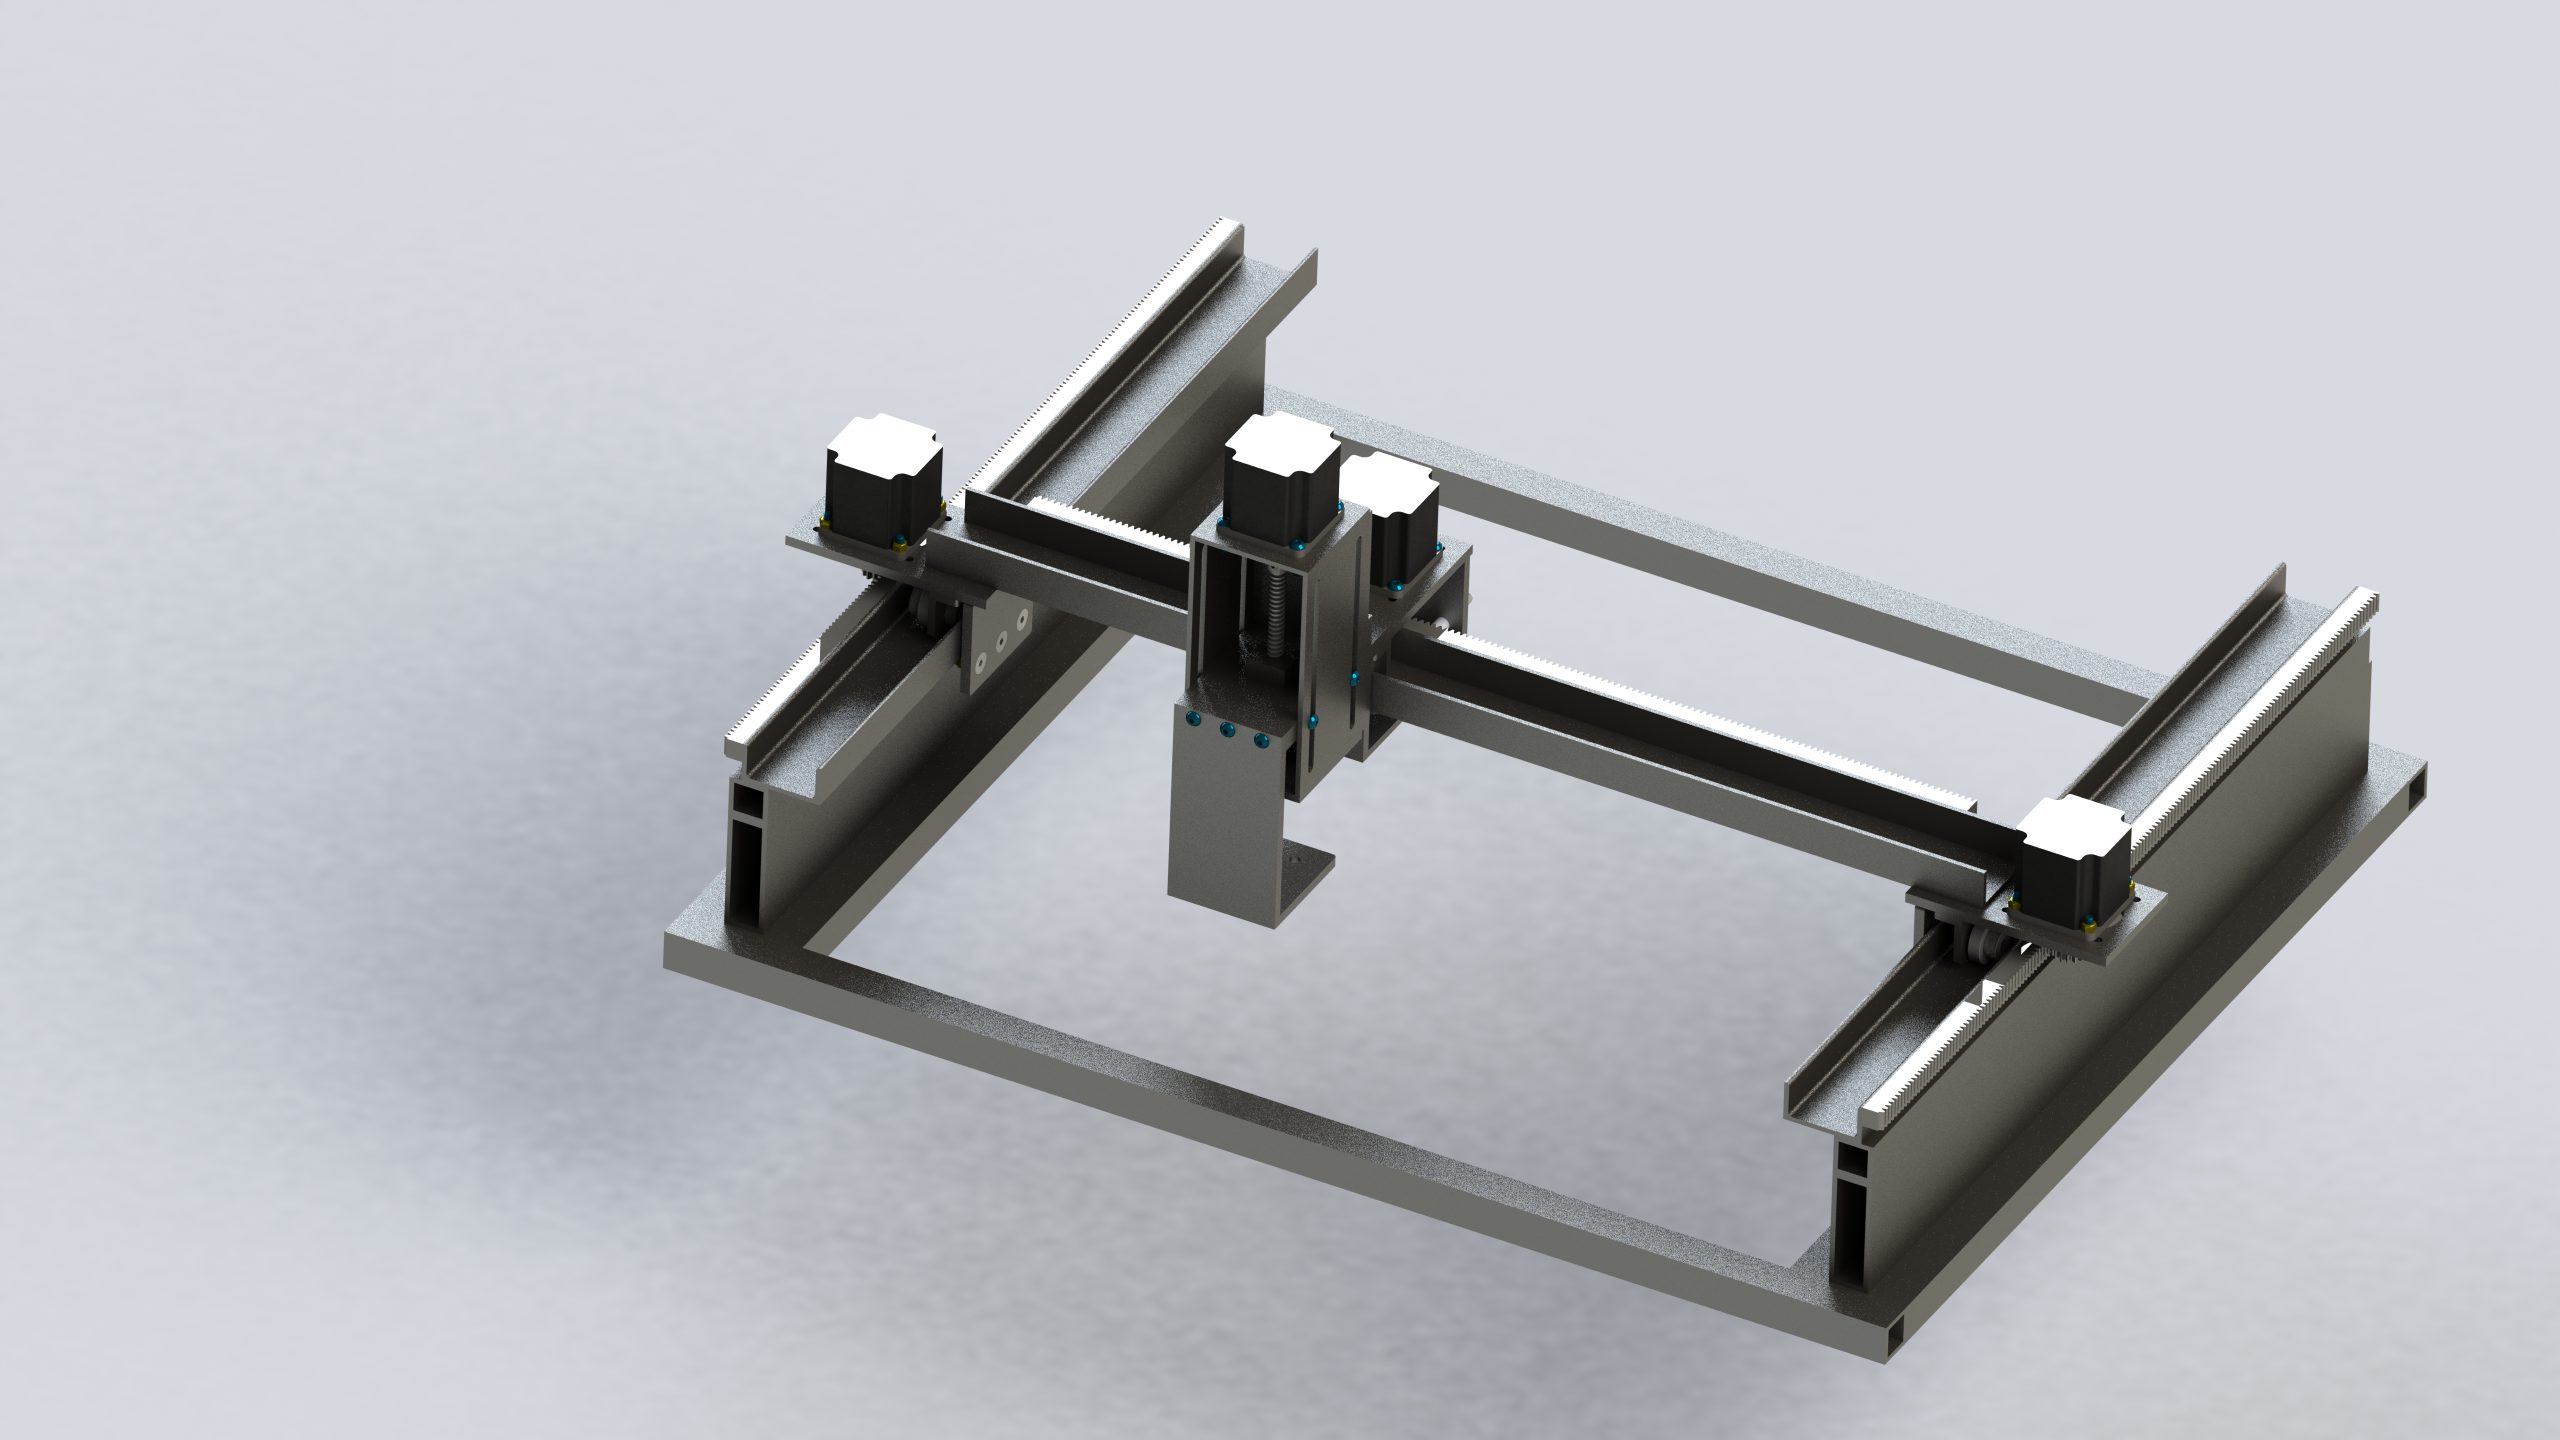
For the time being here is CAD render of the CNC-Plasma-Cutter
——-End of Update——
Slashing through steel, aluminum, and or any other material that conducts electricity while keeping relatively tight tolerances is the end goal for my prototype CNC Plasma Cutter. After spending about of month working on a CAD model for the machine the building phase is ready to begin!
My current setup should allow me to cut through ½” steel and 3/8” aluminum relatively reliably using an AHP Alphacut 60. The current frame allows for a roughly 21” cut area with the ability to fit a piece of material that is 27” wide in the cut bay. The ends of the machine are open allowing for pieces that are much larger than 2ft in length. With open ends, I figured that I would have the ability to buy longer pieces and then I could in index my parts and keep cutting if I had a really large cut. The machine itself is largely made of square tube, c-channel, and flat bar. I was also able to get most of that material as scrap to keep the cost down. Below are some build montage videos. Enjoy!
CrashPlan is a fantastic online and offline backup program. Although it technically does not have full Linux support it can be installed and run on most Linux systems. If the Linux instance has a monitor or is capable of running VNC or VNC-like services there may not be a need to manage it over SSH with X11 forwarding. However, if this is not the case X11 forwarding over an SSH connection is not only feasible but incredibly easy to setup and use. It should only take a maximum of 10 minutes to implement this feature for the first time. All subsequent connections should only take a couple minutes at most to initiate. Lets get started!
There is also a demonstration video embedded below:
1. Make sure that "xterm" is installed.
a. On Debian based systems such as Ubuntu the command is as follows:
5. Once Xming is installed and you are ready to run to connect to your remote instance start Xming and XLaunch
a. Double click both icons to run the programs. Note: nothing should appear after the initial configuration until the "CrashPlanDesktop" command is run from the Putty Terminal
6. Once the Xming Server is up and running it time to test the configuration
a. First load up the puTTY instance that has X11 forwarding enabled and connect to the server
b. Next type the command, CrashPlanDesktop and wait for the CrashPlan logo to appear
Mounting the 6.5 horsepower Harbor Freight engine to the top of the robot produced a lot of vibration and made it extremely difficult to remove the engine. Therefore, I decided to make a separate motor mount that could be detached with 4 5/16in bolts. Below are videos documenting the build process as well as pictures (through the link). Feel free to copy the design but do so only at your own risk!. Happy Building!
Backing up to the cloud can be a great option for data backup. However, despite what companies may say about their security policies you are at their mercy once you upload your content to their servers. However, if you encrypt it before you upload it you have double security. It may seem super paranoid but worst case you just have two layers of security and it takes a little bit longer to work with the raw file, but if there is a hack that breaks into Google Drive, or Onedrive, or B2 or whatever cloud service provider you are using you are now at the mercy of the hacker. However, if you encrypt your files before uploading them you are safe as long as the hacker has not broken 256 bit AES which is highly unlikely.
Companies with Google Apps for Work or students with a school Google Drive Account probably have unlimited cloud storage. Now this is great for work or school documents but it is also a fantastic solution for easy to access server backups. Google Drive has very fast upload speeds and it does not charge for bandwidth like it’s bucket storage sibling does. Therefore, you have unlimited storage for free and possibly for life if your institution retains your email account after you graduate. If you keep working for the same company you probably will have access to the account as long as you are an employee for the company. With Logistics aside Google Drive provides a reliable place to store content. In this tutorial we are going to compress a folder with tar and pipe that command to AES Crypt after the file is encrypted we will run Rclone to upload it to Google Drive. We will also write the program for full cron compatibility so that you can run this command every day, every week, or whenever you want to.
Requirements:
A linux machine that is connected to the internet with tar, AES Crypt, and Rclone installed.


 Users Today :
  This Month :
  This Year :
  Total Users : 310683
Recent Comments